Hi Michael,
I am the owner of an early Rega Planar3, dating from 1979. The TT came with an S-shaped R-200 tone arm (Acos-Lustre). This was quite fashionable at the time. I used it with a variety of Dynavector and Pickering cartridges until 1993 where the arm was changed to a RB300 with an Elys cartridge. At that time the tungsten counterweight was still mounted as standard.
The cartridge was exchanged with a new one occasionally, but the TT was otherwise unmodified until 2012. Time was running out for the TT in this unmodified guise. Especially the speed instability caused by the original motor suspended in a rubber band was unsatisfactory.
Rega offers a 24V motor upgrade kit, where the motor is bonded to the TT. I was not convinced that bonding a motor directly to the thin phenol-resin would be satisfactory.
I was tempted to buy a new P7 or P9. In the end I decided to modify the old Planar3. Before this decision was made, I checked that the plinth wasn’t warped. I checked with a steel rule, and it seems that warping is absolutely minimal, although the surface as such can seem somewhat uneven.
I decided to upgrade and/or replace the following:
· Tone arm
· Cartridge
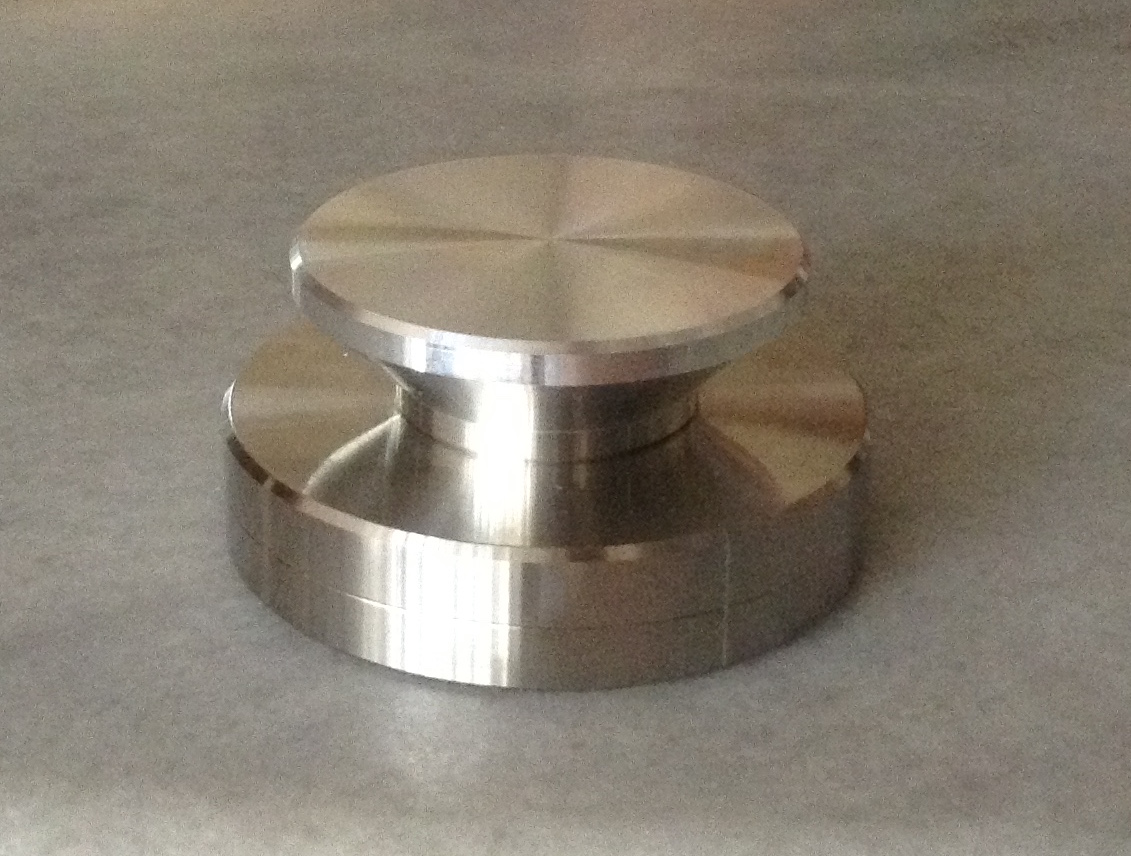
· Sub platter
· Bearing
· Motor ( 24V upgrade)
· Drive belt
I also added a Rega TT PSU.
These parts were bought in the beginning of 2012. I did not start any work, as I had not yet figured out how to mount the motor in a satisfactory way. This lasted till I was introduced to your BlogSpot. Everything now fell into place. The motor could be mounted on an isolation base, and I could fit the motor with a dual pulley in order to aid speed stability.
The parts I ordered from you, arrived in little more than a week. I would like to add, that your Blog Spot has been a great source of inspiration. It does seem that the analogue scene is well and alive.
The procedure:
I stripped the plinth and checked it for straightness. For various reasons I decided to keep the original rubber feet.
I now wanted to replace the original single pulley on the new motor. This involves using acetone to dissolve the glue and a puller to extract the pulley. It is important to ensure that no solvent or glue enters the motor bearing. As the picture below shows, I used a slightly different approach than usual to ensure this.
 I poured acetone in a little glass. The motor was then positioned upside down on the glass. I ensured that the solvent would only just cover the pulley. The arrangement was left to itself for a couple of minutes. By positioning upside down, the solvent cannot enter the motor.
I now used your pulley puller, still keeping the motor upside down.
The puller is in my opinion the gentlest method to do the job without damaging anything.
The pulley came off with very little effort. The shaft was then wiped clean to ensure removal of any glue residue.
The shaft was also checked with a magnifying glass to check the surface. All looked fine.
 The double pulley was a snug, but not overly tight fit. It was possible to slide it onto the shaft with light pressure, so nothing was damaged.
It was placed as close to the motor as possible, without touching the motor bearing.
Motor Mounting:
For years the TT has been placed on a 10Kg. granite slab as shown below, which in turn is placed on two pieces of angled iron and bolted to the wall. The slab is grinded and polished on the top, in order to ensure a smooth surface. I thought I might as well make it an integrated part of the TT assembly.
I wanted to fasten the motor and PCB to it. Holes were drilled in order to make it possible to fasten the components to the slab. The motor base was fastened from the underside of the slab with a M6 bolt through a Ø10 hole in the slab. This gives the possibility of finetuning the tension of the drivebelt, without moving the TT around.
The PCB was mounted upside down with screws in two 5mm rawlplugs. A couple of washers were used as spacers to ensure that the underside doesn't touch the slab. The original cover was put on top.
A 25mm hole was drilled to ensure that the rather thick tonearm cable, can pass through the slab.
The motor is placed with a1.5mm shim under the base. Together with the early type of feet this ensures a distance of 2mm between the motor and TT.
The slab is mounted on two angled irons, bolted to the wall. In order to be able to level the TT, the top of the angled irons are mounted with M6 bolts on which the slab is placed. To ensure the slab can't rock, three bolts instead of four are used.
The whole arrangement is placed in a book shelf with adjustable shelves. In order to make the arrangement less visible, a shelf has been modified with cutouts. The shelf rests approximately 2mm above the slab, and there are 10mm between the shelf and underside of the TT, so there is no contact between the parts.
A wood plate on the front conceals the slab.
The finished TT
The TT is now equipped with a RB700 tone arm, fitted with an Exact cartridge. I have chosen to keep the glass platter and felt mat. The PSU beneath the TT is a new addition. I will keep the TT in this guise for a while, in order to collect some substantial listening impressions. I will then decide if I will do further modifications.
It is reasonable to question the practicality of the whole arrangement, considering the fact that motor and PCB are fastened to a heavy slab. This does make moving the whole lot around a little troublesome. But in this case the TT has been in the same place for years, so this will not be an issue.
The picture below (obviously), shows the new sub platter and dual pulley, together with upgrade drive belts. It was given 35 hours of running with the platter on before listening.
Performance
So how does it perform? The short answer is that performance is very satisfactory. Obviously when doing several modifications in one operation, it can be difficult to be sure which modification represents which change in sound. Never the less I have gathered some impressions which are mentioned in an order that not necessarily represents the gained effect.
The first obvious improvement is speed stability. This is very obvious on piano and violins. A good example of this is Simon and Garfunkel’s “Bridge over troubled water”. At the end there is a very long stretched violin tone. This is very clean and powerful with sharp definition. The details on instruments and voices in general, are also very clear and well defined. Bass is firmer. This must also to some extent be a consequence of speed stability.
The level of undefined background noise is very low. The background is darker, and hiss from the mastertapes can now be very evident on some recordings. I suspect this effect must be a consequence of the new motor and base fitment, as well as the new bearing. Most recordings now reveal details and character that weren’t obvious before.
The general “colour” of the music is probably down to the tone arm and cartridge combination. I recognize the warmth and liveliness from before the modification. Vocals do seem a bit more present though, and everything is reproduced with a little more precision.
Conclusion
Is it reasonable to use a fairly large amount of money on a rebuild/upgrade instead of buying a new player? In my case the answer is yes. First of all you can tailor the modifications to suit your taste. Secondly you can defend doing things you would not do to a new TT. For example I would not have pulled a bonded motor out of a new player and placed it on a slab.
Over the latest period it has become quite clear, that good sound is a question of getting the fundamentals working. Good sound is not voodoo and snake oil. Although the end result is a consequence of several complicated factors, in the end it is a matter of good engineering principles. In the case of a TT, even the finest and most exotic tonearms and cartridges, will not deliver their best if you don’t use quality motors with good decoupling from the plinth, precision pulleys, subplatters and quality bearings.
Best regards
Tommy Andersen
|