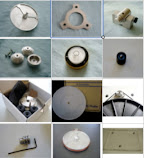
2-motor, 4-belt Rega TT Tweak ... Give it a try!


New Rega tweak : 2-motor, 4-belt turntable 

I have been thinking of experimenting on a "2-motor Rega" for some time....

In fact after experiencing the marked improvements brought about using dual pulley with 2 belts, I was "inspired" to move another step forward on this "path of no return"! I began to mull over the idea of transforming my Rega further with two motors, each driving 2 belts instead.

"4-belt Rega"? Yes, you got it!

Why? Well, this is not something new in turntables. Many high-end turntables are designed with 2 or 3 ... motors.

Better torque and inertia - not only an advantage to handle heavier platter, but provides greater speed stability, hence pitch stability.

Gonna try it out on my Planar 3... It would be exciting to see 4 belts turning on my aluminium sub-platter!

Stay tuned .....

Finally.... and sharing with you here my idea of "4-belt Rega":

1. From the top the plinth, cut out the new pulley hole directly opposite the existing pulley hole so that both pulleys are of equal distance from the bearing. This is to ensure that the pulling force from the two pulleys on the sub-platter is balance on both sides.

2. Next the part at the bottom of the plinth (just below the new pulley hole) must be cut out big enough to accommodate the motor (like the motor compartment). This part requires handyman skill or you may have to enlist the help from a carpenter.

3. Ready now to fix the 2 motors. Getting 2 motors is not a problem for me since all my Rega turntables are with detachable outboard motors (on my stainless steel motor bases). I just need to get hold of two to do the testing. (Not advisable to mount 2 motors on Rega light plinth. The motor vibrations can ruin the music.)


4. With 2 sets of motors sit under the plinth, the 4 belts are lined up (alternating between the 2 pulleys). Fortunately, the sub-platter is just thick enough to do the job! (The idea of 3 motors has to be shelved then!)

5. Putting back the acrylic platter and my "4-belt Rega" is ready for test!

Two motors/motor bases

Two pulleys opposite each other 

4 belts in a row

2nd Dual pulley

4 belts in action 

Now, it's time to spin some lps' and hear the difference ....

WOW...  the immediate impression is like having a system with much bigger "wattage"; the platter attains full speed almost instantaneously; the music is louder and clearer. Possibly this is due to better torque to turn the platter using two motors with dual pulleys. Rumble is also reduced as pulling force on the sub-platter is more balanced from two sides. Higher inertia with greater speed stability is another reason for the sonic improvement. One important point to remember is in order to get maximum benefit from this tweak, both the motors must be off the plinth as vibration from one motor is already bad enough, two.... would "kill" the music for sure.

Try it out if you are adventurous. Hear for yourself as hearing is believing!!

It's a positive mod to me. But to do this mod requires some effort.

My conclusion is simple :

I love dual pulley.... 
I love dual motors+dual pulleys more .... 

That's what I can say after all the hard work!


Read Users' Comments ( 3 )


Rega motor upgrade kit though solves the motor wobbling problem in Planar TT's, motor vibrations transmitted to the plinth would not be eliminated with this upgrade. However, if the motor is mounted off the plinth, those undesirable motor vibrations picked up by the cartridge would be "gone". As a result, background noise is very much reduced and we would be able to enjoy music with better imaging.

Scott Lea of Arizona, USA has upgraded his Planar 2 with motor isolation base, dual pulley and silicone belts upgrades. Let's hear what he says:


Hello Michael, 

When I decided to upgrade my Planar 2 I thought the right thing to do was get the Rega Motor Upgrade Kit. I was truly disappointed to see the motor mounted with a sticky pad. That's when I did the research I should have done in the beginning. 

When I saw your webpage I knew I was in the right place. Your method of mounting the motor off the plinth is a truly elegant solution. 

I also love the double belt pulley. 

The turntable is now awesome! My Dynavector Karat 17D2 now sings! 

I have been collecting vinyl since the 60s and am rediscovering the treasures I have! 

Also been buying new and used LPs in the last month like crazy. 

I was frustrated with digital and went so far as purchasing an Ayon CD player. A very excellent machine but I still was not satisfied. 

Thanks for helping return the joy of listening to music again! The thrill is back! 

Highly recommended! 

Thanks again! 

Scott Lea 
Arizona, United States


Motor isolation base upgrade 


Dual pulley and silicone belts upgrades


Thanks Scott!


Read Users' Comments ( 0 )


This is a question many may ask when considering the aluminium feet upgrade, including Nick Jenkins from United Kingdom:


I also wasn’t sure whether your aluminium feet would just slot straight in, as I believe the P9 feet do require some filing down first.... "  

Rega P9 feet 

Don't you worry, my aluminium feet are designed slightly different from the original Rega P9 feet and there's no filing required and I shall add this note under my post on aluminium feet earlier to avoid confusion.

Here's Nick Jenkins' upgraded RP3 and his comments on the upgrades:


Pictures : courtesy of Nick Jenkins of United Kingdom
Dual pulley and silicone belts upgrades on RP3


Sand-filled Aluminium feet upgrade on RP3 


Dear Michael, 

Just wanted to thank you for your products. I was a little apprehensive about removing the original pulley but the pulley puller and a drop of white spirit made it very easy. I filled the feet with sand as per your suggestion – it was a bit more difficult to get them into the aluminium cups as the rubber was pretty stiff and a small screwdriver helped to prise them in. 


I was really surprised at the improvement in sound, particularly with the dual pulley. There’s more bass weight, rhythmic drive and detail, and surface noise is less obvious. I listen a lot through headphones which can be rather unforgiving compared to speakers, but I’m now enjoying my records a lot, and needless to say am very pleased. 


Thanks once again. 


Best wishes, 


Nick, United Kingdom


Thanks, Nick!


Read Users' Comments ( 0 )

Does the SIZE of the main bearing matters ?


The main bearing of a turntable is the housing for the hub or sub-platter which plays the major role in spinning our records. Therefore we shall not overlook the importance of this main bearing.

I notice most of the better decks I own come with main bearings of around 3/4''( ~18mm-20 mm) diameter . Here are a few examples:

Rega P5 TT, Planar 2/3 TT, Linn LP12TT, Thorens 150/160TT, Thorens 125TT......

In my opinion, to handle the rotating load efficiently,  the bearing must be sufficiently big (in thickness) in order to maintain rigidity. The bigger the diameter/thickness, the more rigid the bearing housing is. Moreover, bigger mass also helps to absorb some of the vibration and heat energy that is emanating from the bearing when the sub-platter is spinning.

I have a P1 TT which has a smaller bearing hub (12mm or ~ 1/2" in diameter). Its housing wall is thinner and fits the same sub-platter as my other Rega decks. It is also of lesser mass(~ 1/3 ) than that of its bigger brethren( P2 to P5).

Have nothing better to do, recently I thought of tweaking my P1 main bearing(12mm). With rigidity and higher mass in mind, I  designed and custom-made a hexagonal shape stainless steel main bearing sheath (19mm or 3/4") to be screwed on to the existing bearing. Of course you may say, just change this 12mm bearing to a new bigger bearing will do. But that would involve more tedious work like enlarging the mounting hole on the plinth which I don't wish to do.

If you are concerned that heavier glass/acrylic/delrin platters would be strenuous to the main bearing of your RP1/P1TT, this 3/4" heavy duty stainless steel bearing sheath probably would relieve you of your anxieties.

This simple tweak is easy to carry out for anyone without technical skill.

Bearing Sheath For P1/RP1
(BS1 - USD 8.00)
Side view


So improving the rigidity of the main bearing is another tweak to bring about sonic improvement!


Wes Anderson of Canada commented :


The "nut" does work well, you can definitely here a sound quality improvement over stock.                         


Read Users' Comments ( 0 )

Related Posts Plugin for WordPress, Blogger...