VTA adjuster
Model : VTA-HN-3-point
USD58.00
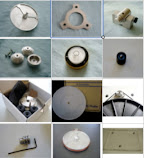
Some cartridges, especially MC cartridges, are sensitive to vertical tracking angle (VTA). For more precise tracking, an adjustable VTA is the dream for many. And here is the good news; I have just designed a new VTA adjuster particular to meet this requirement of yours.

The new VTA-adjuster (as you can see from the picture above) is for the 3-point mount tonearms (e.g RB101/RB251/RB301/RB303). With this adjuster, the VTA can be adjusted starting from 1.5mm onwards (with any desirable incremental value) to the correct VTA you require (within the limit). 

Besides, I have also designed the VTA adjuster  to retrofit the existing 25mm(1") diameter tonearm mounting hole for RP3/P3-24/RP6 turntables. Hope it would be a good and easy upgrade for you and your beloved TT's.

So from now on, VTA problems that follow after a cartridge change would not be a headache to you any more.

Here's the installation on my RP3 with RB303 : 


Read Users' Comments ( 13 )

Tom Owen's acrylic plinth upgrade ....


Upgrading a turntable with your own unique ideas is not just a hobby. You will be amazed by the wonderful end result you get! 

Welcome to join in this great hobby and let the beautiful music it brings brighten up your days!


Take a look at the pictures of Tom's upgraded TT here with braced black color top acrylic plinth, outboard motor isolation base and bronze bearing hub.


Enjoy! 


Hi Michael. 

First impressions are that the parts are of high quality fit and finish. This was proved by the ability to transfer parts from the original table to the replacement; all parts fit the replacement base without modification. The table itself is a work of art! Absolutely beautiful. 

The motor isolation base fit the replacement motor without problem. My original motor mounting was via a rubber band which was located by the factory bending the two locating tabs on the motor itself. All that was required was straightening these flat. Once done, the motor bolted straight onto the base without problem. The supplied shims allowed me level the drive pulleys. All in all, it works well. 

I chose to extend the wiring from the motor to the control board. I cut and spliced an additional 8 inches of wiring so I could locate the switch and control board off to the side of the turntable. I was careful to include strain relief at both ends of the wiring extension. Wiring was covered in heat shrink. 

Overall this is a 9.5 out of 10. Well done.

Here are a couple of pictures.


Thanks Tom !


Read Users' Comments ( 0 )

John Gallup's RP3 upgrades


It's a breeze to remove and install the dual pulley - John just took 10 minutes to get it done for his RP3! 
If what makes you shy off from this upgrade is the whole process involved in installation of the pulley, then the assurance is here! 

Michael,
Here are a couple of photos of my RP-3 with your products installed.

Stock pulley removed...came off easily with your puller and some acetone:


Here are the belts in place on your pulley and a GrooveTracer subplatter:


The whole process took about 10 minutes.

I installed your adjustable feet a few weeks ago. This is the Rega turntable platform, with a sheet of MDF added to act as a heat shield--my amp is right beneath it, and the aluminum duct tape on the bottom of the MDF keeps the heat away from the turntable motor.


 It's a pleasure doing business with you!

 John Gallup


Another upgrade for John : Motor isolation base
Michael,

These arrived yesterday and were installed today. I believe I can detect improved bass response from my RP3 (which also has your adjustable feet, double belts and pulley, and a number of other tweaks). Listening right now to "Neil Young Live at the Cellar Door," I feel a stronger presence and intimacy to the performance. I don't recall what other users have reported but the improvements more than justify the modest cost of the base.


I was very impressed with the quality of the product, and with the clever engineering that re-uses existing parts to make installation pretty simple. It took me about an hour and half, and quite a bit of that time was spent peeling of the remnants of the double-stick tape that held the motor to the plinth. 

Here are a couple of thoughts on the installation process that might be of interest:
1. I was surprised that nothing I saw on your website or in the instructions you sent mentioned the requirement to cut the existing power switch wires and solder them to the new switch. I'm not the most skillful solderer but this was simple enough.
2. The leads on the motor wires limit the distance from the motor isolation base to the PC board box. Everything worked, but reaching the little switch might be a problem for users who don't switch the TT on and off elsewhere.
3. I use Rega's wall-mounting bracket, with an MDF board in the open space between the three foot platforms and the rails supporting them. Fortunately the isolation base falls within the perimeter of the rails.
4. Included in the kit was a white foam disk about 100 mm in diameter. I still haven't figured out what that is for.

Keep up the good work!

Regards,
John Gallup
San Diego California USA


Thanks John!


Read Users' Comments ( 0 )

Related Posts Plugin for WordPress, Blogger...